10.14.2016 : Fixed the ZIP file for the Jessie-Lite disk image. 1st one was an invalid zip.
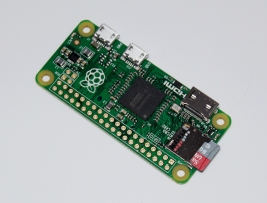
10.09.2016 Black Mesa Labs is a huge fan of both the Arduino community and the Raspberry Pi community. Arduino’s make it really simple to do embedded tasks that don’t require a ton of horsepower ( flashing LEDs, etc ) where-is the RaspberryPi platform provides the full power ( and complexity ) of a complete Linux workstation for as little as $5 ( Pi Zero ). Unfortunately, embedding a $5 Linux workstation isn’t always what you really want to do. You want to embed software into something like an Arduino that you apply power to and it then does something pre-programmed, no mouse, no login, no screen or keyboard required. Wouldn’t it be great for non-SysAdmins to have a easy to use RaspberryPi solution for booting Linux and running a single predetermined piece of software like an Arduino does? Keep reading, Black Mesa Labs has a solution…
BML has created a custom Raspbian Jessie-Lite image for booting and executing a single application easily. This Pi image was used for the HAB1 balloon ascent to 31km (103,000 feet ) in April of 2016. At the start of the project BML realized the amount of software required in the limited time for the flight just wasn’t possible writing embedded C/C++ code. At BML the most precious resource is engineering time, therefore software projects tend to be written in Python whenever possible as the time overhead for writing, compiling, downloading and testing C and C++ is a tremendous hindrance. BML efficiency and quality of software using Python is easily 10x that of C/C++ ( and don’t get me started on writing and debugging Assembly language ).
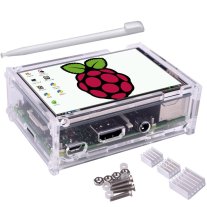
This post is the detailed description of creating this 2GB Pi image for embedded Python that anyone is free to either create or just download ( from above dropbox link ) and image on their own Pi SD card. Running custom software ( Python text based, or PyGame full graphical ) is as easy as copying a single Python file to a USB stick and then turning the Pi on. This image is designed to work headless ( no screen – as was used in HAB1 ), or optionally with a HDMI display, or a 3.5″ 480×320 TFT display from either AdaFruit or Kuman.
The brains of the operation is this single file boot_script-sh containing 70 lines of BASH scripting that executes on powerup and behaves like a PC’s BIOS boot sequence of boot from A:\ ( Floppy ), D:\ ( CD-ROM ) and then finally C:\ ( hard drive ). The BML boot_script.sh attempts to execute from a NAS ( Network drive ) 1st, then from the USB stick and finally from the SD card looking for special pragma files on what to do. It also automates software updates by auto de-tarring ( unzipping ) *.tgz or *.zip files from a USB stick to the SD card. In short, you can write some Python on your PC ( or Linux workstation ) , copy it to your your USB flash drive, stick it in your Pi and your Pi will run it automatically on boot. Streamlined and efficient, right?
This post ends with a detailed list of instructions on configuring an off-the-shelf Raspbian Jessie-Lite image for this automated behavior. Look for an example PyGame application soon from BML that fully utilizes the Pi camera and TFT touch screen display in an example embedded camera application.
[ Download 2GB PiTFTr Jessie-Lite image from Adafruit ]
https://adafruit-download.s3.amazonaws.com/2016-03-25_Jessie_Lite_PiTFT35r.zip
RASPBIAN JESSIE LITE
Minimal image based on Debian Jessie for Pi 1,2,3
Release date:2016-03-25
Kernel version:4.4.23+
[ If using Kuman display, download and burn 2nd card from Kuman CD-ROM ]
Copy 2 files from Kuman Image to Adafruit Image:
/boot/overlay/tft35a.dtbo
/boot/overlay/tft35a-overlay.dtb
Select display to use by changing line in /boot/config.txt
WARNING: If not using TFT display, line MUST be commented out
(Note: This can be done from Windows as /boot is FAT partition )
From: dtoverlay=pitft35r : For AdaFruit 3.5″ TFT Display
To: dtoverlay=tft35a : For Kuman 3.5″ TFT Display
To: #dtoverlay=pitft35r : For regular HDMI Display
[ 1st Boot : Login pi,raspberry ]
[ Configure Raspbian ]
sudo raspi-config
1) Expand Filesystem to fill 2GB card.
3) Boot to Command Line. B2=Console AutoLogin as pi
4) Wait for Network on Boot. YES
5) International
Locales : Deselect en_GB.UTF-8 UTF-8
Select en_US.UTF-8 UTF-8
TimeZone : US Pacific-New
Keyboard : Generic 104-key PC, English-US
6) Enable Camera Interface = YES
9) Advanced Options
A2 : HOSTNAME : RaspPi
A4 : SSH : YES
A6 : SPI : YES
A7 : I2C : YES
A8 : SERIAL : NO ( Don’t allow serial port login )
A9 : AUDIO = AUTO ( vs Force HDMI or Force 3.5mm )
[ Reboot and run /sbin/ifconfig to get IP Address ]
[ ssh 192.168.1.144 -l pi ( password raspberry ) from normal desktop ]
Note: May be necessary to delete ~.ssh/known_hosts file
[ Running script automatically after login ]
sudo vi /etc/profile
Add the following line to the end of the file
. /home/pi/boot_script.sh
[ Enable Mounting USB Drives ]
sudo apt-get install usbmount
sudo vi /etc/usbmount/usbmount.conf and modify line: ( Makes USB Writable )
FS_MOUNTOPTIONS=”-fstype=vfat,umask=0000″
[ Enabling tmpfs – Writing temp files to RAMdisk instead of SD Card ]
http://www.zdnet.com/article/raspberry-pi-extending-the-life-of-the-sd-card/
sudo vi /etc/fstab
tmpfs /tmp tmpfs defaults,noatime,nosuid,size=100m 0 0
tmpfs /var/tmp tmpfs defaults,noatime,nosuid,size=30m 0 0
tmpfs /var/log tmpfs defaults,noatime,nosuid,mode=0755,size=100m 0 0
tmpfs /var/spool/mqueue tmpfs defaults,noatime,nosuid,mode=0700,gid=12,size=30m 0 0
# Unable to reboot or shutdown. “Failed to talk to init damoen”
# tmpfs /var/run tmpfs defaults,noatime,nosuid,mode=0755,size=2m 0 0
[ Mounting BlackMesa NAS ]
mkdir /home/pi/nas
sudo vi /etc/fstab
//BlackMesa/khubbard /home/pi/nas cifs auto,uid=1000,gid=1000,username=khubbard,password=password,rw,file_mode=0666,dir_mode=0777 0 0
[ Allow users to modify /boot/config.txt without sudo (for force_hdmi things) ]
/etc/fstab
#/dev/mmcblk0p1 /boot vfat defaults 0 2
/dev/mmcblk0p1 /boot vfat users,rw,owner,umask=000 0 2
[ Installing PyGame for Jessie-Lite ]
sudo apt-get install rpi-update
sudo rpi-update
sudo apt-get update
sudo apy-get install python-pygame
sudo apt-get install python-picamera
[ Install MP4Box for Converting H264: MP4Box -add filename.h264 filename.mp4 ]
sudo apt-get install gpac
[ Speech Synthesis w/o Internet Connection ]
sudo apt-get install espeak
espeak -ven+f3 -k5 -s150 “I’ve just picked up a AE35 fault ” 2>/dev/null
[ PySerial ]
sudo apt-get install python-pip
sudo pip install pyserial
[ SPI Serial spidev ]
sudo apt-get install python-dev
sudo apt-get install git
git clone git://github.com/doceme/py-spidev
cd py-spidev
sudo python setup.py install
[ RockBlock Sat Modem ]
sudo apt-get install screen
sudo apt-get install usbutils
git clone https://github.com/MakerSnake/pyRockBlock
[ Schedule a fsck at next reboot ]
sudo touch /forcefsck


$ unzip jessie_lite_bml_2016_10_09.zip
Archive: jessie_lite_bml_2016_10_09.zip
End-of-central-directory signature not found. Either this file is not
a zipfile, or it constitutes one disk of a multi-part archive. In the
latter case the central directory and zipfile comment will be found on
the last disk(s) of this archive.
unzip: cannot find zipfile directory in one of jessie_lite_bml_2016_10_09.zip or
jessie_lite_bml_2016_10_09.zip.zip, and cannot find jessie_lite_bml_2016_10_09.zip.ZIP, period.
?
LikeLike
I just confirmed I was unable to unzip using 7-Zip on a different PC. I will look into this this evening ( about 12 hours from now ). My apologies.
LikeLike
New ZIP file has been uploaded. Please let me know if you have any further problems.
LikeLike
[…] Here are some simple instructions – along with a custom image of Raspbian Jessie-Lite – the some might find useful for automating Python code automatically on boot: […]
LikeLike
[…] Easy path to running embedded Python on a RaspberryPi […]
LikeLike